Starting Seedlings Indoors
Share
A Beginner’s Guide to Success
Starting seedlings indoors can feel like an exciting science experiment that leads to a flourishing garden. However, it can quickly become a lesson in what not to do without the right practices. Let’s explore the best methods for giving your seedlings the strong start they deserve, avoiding common pitfalls like leggy plants, fungus gnats, and overgrown starts. Oh, and yes—you should pet your plants!

Best Practices for Indoor Seed Starting
1. Use the Right Equipment
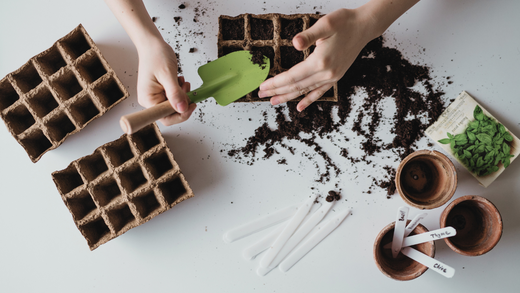
Having the right tools makes all the difference, but you don't have to buy everything new. Look around your house—you might already have containers or trays you can repurpose. If you do decide to splurge, prioritize grow lights and a small fan.
- Seed Trays with drainage holes. These let excess water escape and prevent soggy roots.
- Soilless Seed Starting Mix This lightweight medium drains well reduces the risk of fungus gnats, and provides a clean environment for germination. Do not bring in soil from outside as this could bring pests into your home.
- Grow Lights Even with a sunny South facing window, grow lights provide the consistent, full-spectrum light your seedlings need to grow big and strong.
- Seedling Heat Mat (optional) If your house runs chilly, a heat mat can speed up germination. Some warmer climate plants require warm temperatures.
- Small Fan(s) Airflow strengthens stems and helps to prevent fungal diseases.

2. Bottom Watering = Happier Plants
After your seedlings sprout, water by filling the tray underneath your seedlings and let the medium soak it up. This method keeps the soil evenly moist, avoids overwatering, deters fungus gnats, and promotes strong deep roots.
3. Preventing Leggy Seedlings
Leggy seedlings happen when your plants aren't getting enough light and stretch toward the light source, making them weak (and well.. leggy). By placing your grow lights 2-4 inches above the seedlings and adjust as they grow you are giving your seedlings a stronger start. A small fan or gentle breeze from an open window also helps strengthen their stems. Make sure that breeze isn't too cold.

4. Don’t Overwater!
This is a rookie mistake. Your seedling's roots need oxygen just as much as they need water. Let the top of the soil dry out slightly before watering again. If you would like to read more about watering, take a look at the post linked below.
5. Pet Your Plants
Yes, you read that right. Brushing your hands gently over your seedlings mimics wind, encourages sturdy growth, and helps you bond with your plants (not weird, I promise).

Timeline for Starting Seeds in Zone 7
Zone 7 gardeners enjoy a moderate growing season, but timing is still crucial to avoid overgrown seedlings as they become weak and susceptible to disease and pests. Below you will find a general timeline to follow. If you don't have the room, time, or are worried about the process, we offer a short window to subscribe to our Plant CSA. If you've missed our Plant CSA ordering window there are ither ways to order plants from us. For vegetables there is the Custom Cultivation option. If you aren't local to us or would like to start from seed, we have hand packaged seeds, and if you're in the area you can order plants from our nursery. You can always check plant availability online.
Spring Seedlings
- 10-12 weeks before the last frost (around February 1st): Start slow growers like onions, leeks, and celery.
- 6-8 weeks before the last frost: Start brassicas (like broccoli, cabbage, and kale). These cool-weather crops thrive when transplanted outdoors a few weeks before the last frost.
- 4-6 weeks before the last frost: Start fast-growing greens like lettuce, spinach, and chard.
Summer Seedlings
- 6-8 weeks before planting out (late March to early April): Start warm-weather crops like tomatoes, peppers, and eggplants. These heat-lovers can only be transplanted outdoors after the soil has warmed and all danger of frost has passed, typically in late May.
- 4-6 weeks before planting out: Start cucumbers, squash, and melons. These grow quickly and should not be transplanted until the danger of frost has passed.
Pro Tip: Keep a calendar and count backward from your last frost date to avoid overcrowding your growing space or ending up with stressed seedlings.

Why a Window Isn’t Enough
Seedlings need 12-16 hours of strong light daily. Even the sunniest windowsill often falls short, especially in late winter or early spring. Without sufficient light, your plants will grow tall, thin, and floppy. Pairing grow lights with proper airflow (hello, fan!) helps seedlings develop sturdy stems, preparing them for life in the great outdoors.
The Role of Wind (and Your Hands)
The wind is nature’s gym for plants. It strengthens their stems, preparing them for outdoor breezes. Indoors, a small fan on a low setting can replicate this effect. Don’t have a fan? That’s where petting comes in—gently running your hands over your seedlings a couple of times daily also promotes resilience.
Hardening Off
Before planting your seedlings outdoors, they need time to adjust to real-world conditions like sunlight, wind, and fluctuating temperatures. This process, called hardening off, typically takes 7-10 days. Start by placing your seedlings outside in a sheltered spot for a few hours, gradually increasing their exposure to direct sunlight and outdoor conditions each day. If you tend to forget about your plants, or can't check on them often, choosing a day with some healthy overcast and an easy breeze to harden them off will help a lot. By the end of the hardening-off period, your plants will be ready to handle life in the garden with strength and confidence.

You've Got This!
Starting seedlings indoors is as much an art as it is a science. With the right timing, tools, and techniques, you’ll grow strong, healthy plants that thrive when transplanted outdoors. Remember: don’t start too early, invest in proper lighting, and give your seedlings the attention (and pats) they need to flourish.
LFG (Let’s Flourish & Grow)!


